KEEP
|
For 36 years I.C.E. Inc, in San Diego has been manufacturing and servicing
automotive air conditioning systems. I.C.E. Inc. provides informative data pertinent to
retrofitting of A/C and a knowledgeable technical staff for replacement parts and complete
A/C systems.
The vehicle, which we are retrofitting, is a 1986 BMW 325. The car had over 150,000 miles
and the valves in the compressor were worn out. Since the vehicle needed a new compressor
it was beneficial to retrofit the car to an R-134a refrigerant. The car had a factory
installed Bosch compressor (see photo 4). This compressor was replaced with a Seltec (or
you can use a Sanden). The reason the Bosch compressor was not used, as a replacement was
the increased cost compared to the Seltec or Sanden compressor.
NOTE: Retrofitting a vehicle is executed in a step by step by step procedure to ensure a
proper upgrade. The system must be thoroughly evacuated, before replacing the refrigerant.
Specification Chart
| R-134a | R-12 | |
| Discharge Pressure | 160-345 | 150-285 |
| Suction Pressure | 12-27 | 15-30 |
| Refrigerant Capacity | 32 oz | 35 oz |
| Oil Capacity (Bosch) | 10 oz | 10 oz |
| Oil Capacity (Seltec/Sanden) | 8 oz | 8 oz |
RETROFITTING A BMW 325 (1984-1992)
If your air conditioner needs repairs, it makes sense to switch to the newly required environmentally safe refrigerant
Performing the Retrofit: Before any work is initialed the system has to be checked for leaks. This is done first before any seals are broken. Checking for leaks first will evaluate the condition of the existing system before any repairs are made. It is best to use a halogen type leak detector. These testers are typically rated to detect leaks as small as 0.1 pounds per year. Ask your air conditioner shop to use halogen type leak detector rather than electronic dye which is not as accurate for detecting leaks. Once the system is tested for leaks note if any repairs are to be made. Our vehicle had a leaky suction line running from the evaporator to the compressor. A new #10 refrigerant hose was made up and will be installed with the new compressor.
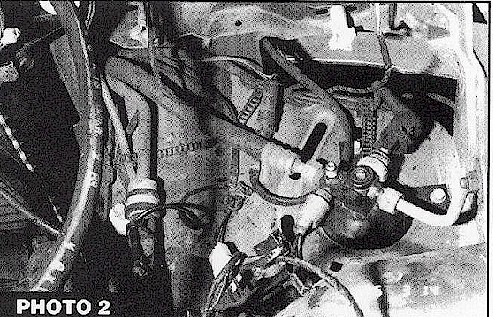
Step two: is the evacuation of the system's R-12 refrigerant from the A/C
system. Connect the high and low manifold (gauges) with vacuum pump attached to the high
and low service port fittings in the vehicle (see photo 2). Open up the high side manifold
valve first and start evacuating. When the low side starts to pull vacuum the system is
clear. Now open up the low side manifold valve. It is very important to continue to draw
vacuum for an additional 15-20 minutes to extract as much oil and moisture from the A/C
system.
Step three: Remove the old compressor and mount (see photo I & 4). Install new
Seltec/Sanden compressor mount (see figure 1).
NOTE: When installing the new compressor you must drain out the oil and add ester oil and install (for retrofit only).
Drain the oil from the new compressor into a measuring cup. Then replace the same amount with ester oil and install the new compressor drive belt.